I decided i wanted to do this because of the hype in the media about the movie 'Alice In Wonderland' by Tim Burton. My vision became my photo, i thought of the perfect location (my friends fairytale like backgarden), i knew it would be possible to get the props for the 'tea party'-(which is the scene i was determined to do) scene e.g. cupcakes, vintage teapots etc. My friend as Alice, who has long blond hair, blue eyes, right height, and contrasted well with blue; i knew i could style her and mould her into the Alice i created in my head.
POCAHONTAS
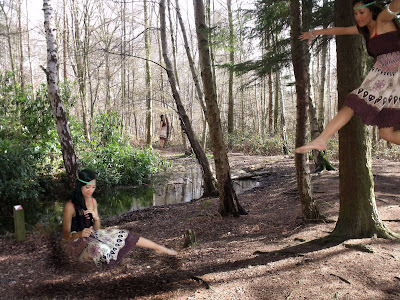
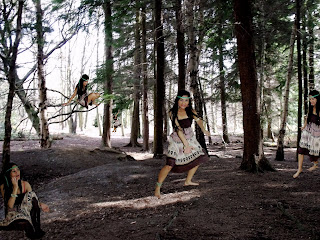
I decided to do two separate shoots; one of which was at Trent park (woods, forests, lakes), the other was my model who i knew i could style to help us identify her as Pocahontas. I Photoshoped 'pocahontas' into the forest/woods, to make it look like shes really there. I used the Layering and mask technique.
This is how i did it.
- I Decided which photo i wanted as my background and which one i wanted to be the overlay (to go into the 'background' picture)
- I Used the move tool (top right 'tool palette' icon). Clicked on to the overlay picture and drag it on top of your background picture; which now appears in the background layer palette as 'Layer 1'.
- In the 'Layer Palette', i changed the 'Opacity' scale to a lower percentage (making sure that 'Layer 1' is selected). To make it easier to see, showing the background layer behind as well as the overlay.
- I Created a Layer Mask and using 'reveal all' or 'hide all'. This helps to improve your accuracy but remember whichever way you do this the job is fiddly! I Selected the top layer 'Layer 1' -
layer - layer mask - reveal all.
- I did this because Reveal all shows all the overlay. You can alter the opacity in the Layers palette if this helps but it is easier to see what you are doing at 100%. To get rid of what I don't want use the paintbrushes. First, I checked that the colours (at the bottom of the 'tool palette') are black and white - you can switch between these using 'x' on the keyboard (to add or subtract from the picture).
- I Clicked on paint brush and choose an appropriate size from the tool bar. I Made sure the layer box in the Layer palette is highlighted (clicked on it). Then painted away with the brush - getting rid of the overlay that you don't want. If you take away something you want press 'x' on the keyboard and then paint it back in.
-and using 'hide all'. At number 4 above you can click on 'hide all' instead in which case the overlay is hidden and you paint it back in using a paintbrush and the black and white colours at the bottom of the tool palette.
I also used the burn tool to create shadows, which is the hand tool in the palette on the left (14th from the top) i changed the harshness of the brush, to seem more real.


